
In order to publish a website in Composum Pages, it must first be created as a site object in the repository. This can be done directly from the Pages home page
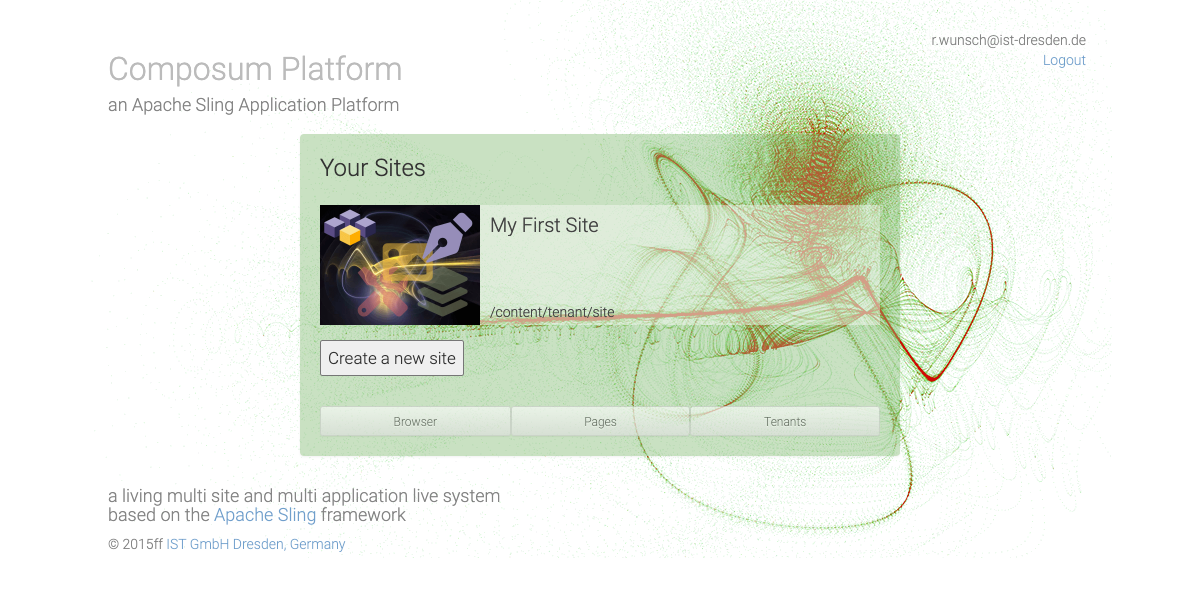
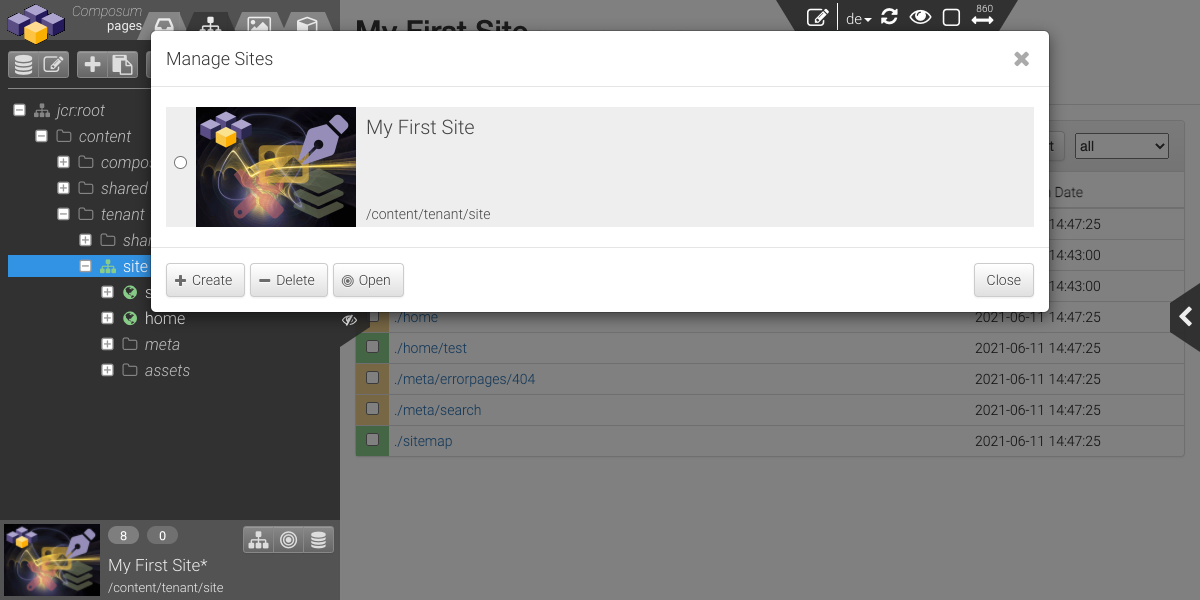
or from the site management dialog. The site management dialog is accessible via the buttons with the 'Database' icon (stacked discs) at the bottom left of the site tile or in the site toolbar in the tree at the top right.
With 'Create a new site' / 'Create' the wizard for creating a site is activated. First, a list of available templates for a new site is offered.
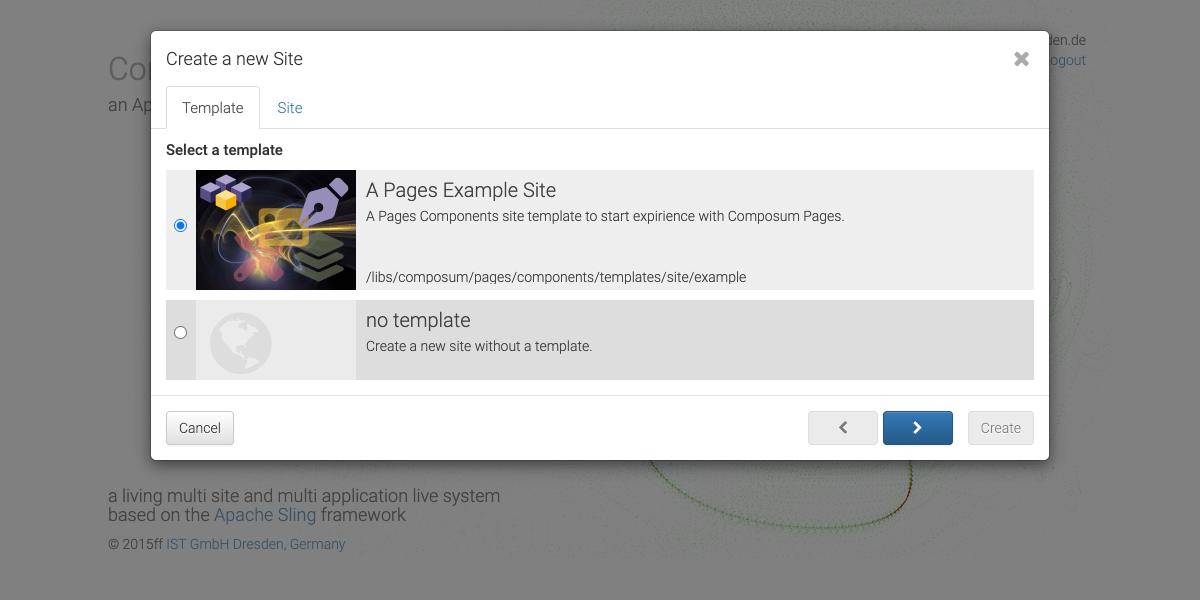
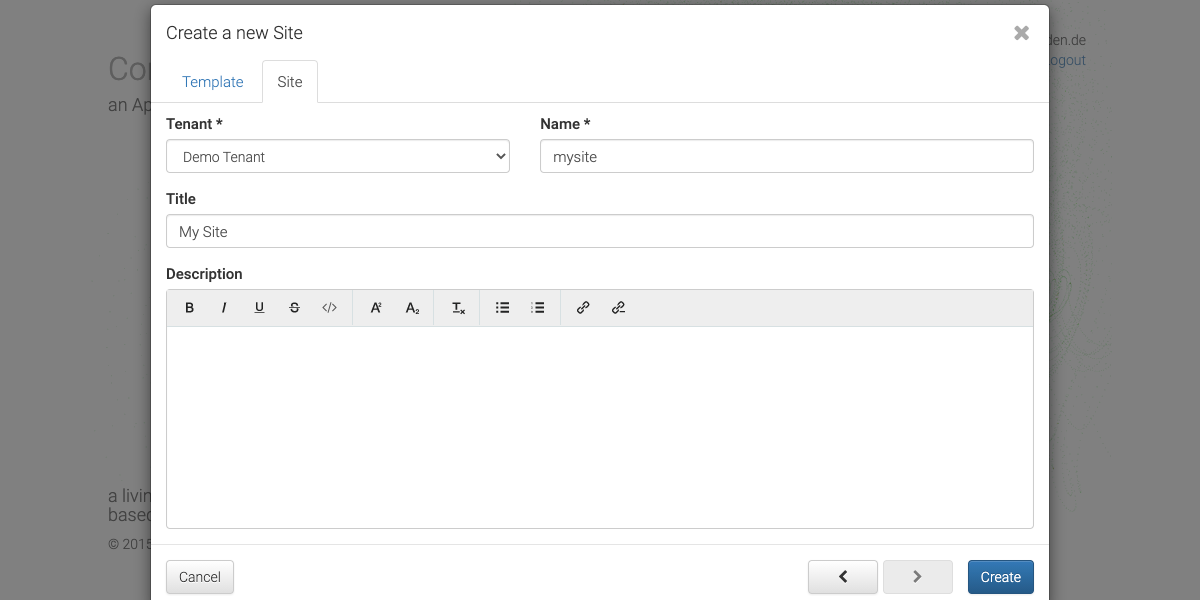
After selecting the appropriate template, the next step is simply to assign the desired tenant and define the name of the site, i.e. the name of the resource of the site in the content repository.
Depending on the view from which the creation of the site is activated, the site is opened directly after creation (creation from the Pages start page) or must be explicitly selected and opened (Site Management dialog).
The new website shows its status page when selected in the repository tree and thus also after opening. In the tree on the left, the content initially taken from the template can be selected, modified and extended.
However, more interesting for our case is the publishing of the existing content.
In order to publish all content that has been transferred from the template to the new site, this content must first be activated. This can be done for each content element in its edit view. In our case, however, it is easier to switch to the list of modified elements, select them in the block and activate them with 'Activate'.
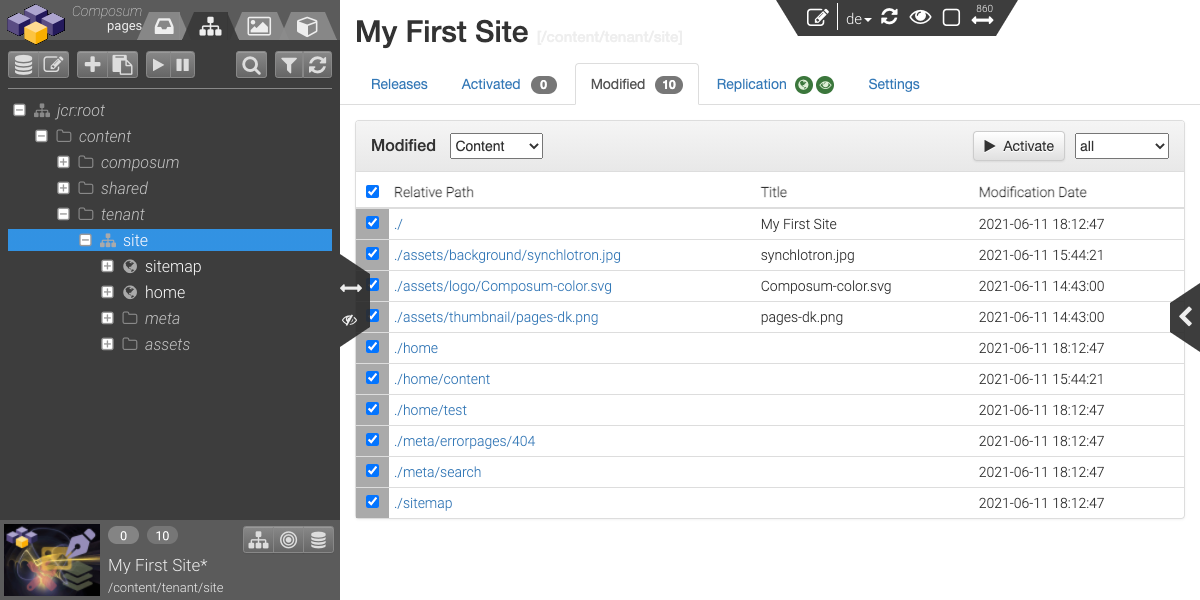
With activation, the selected content is assigned to the current release. This release is always present and collects all content items released with their activation for the next publication.
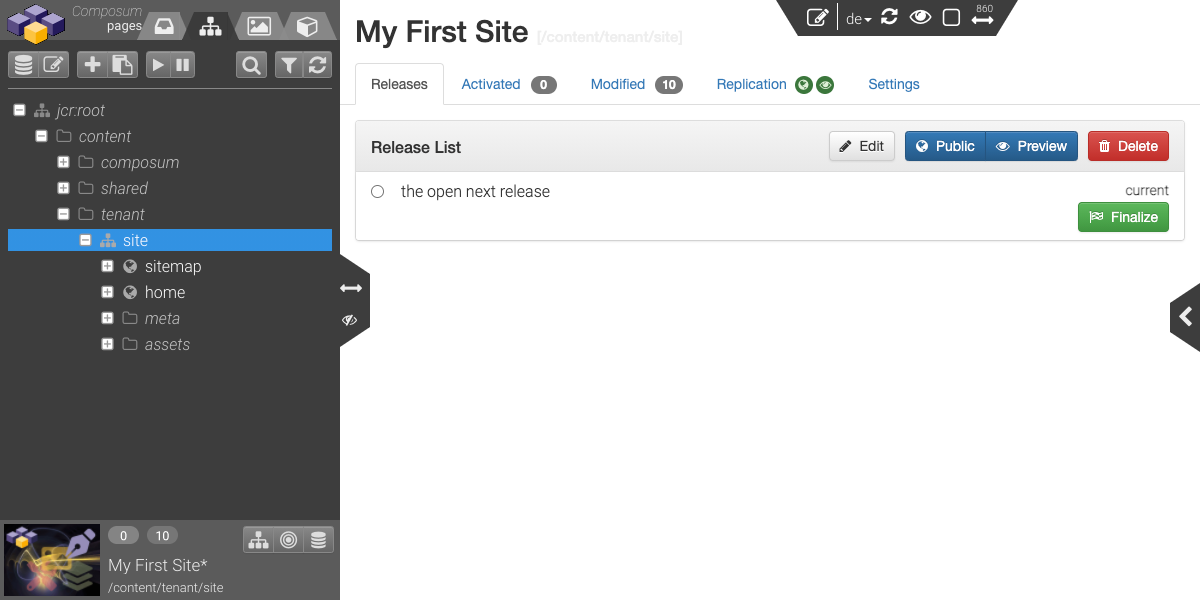
In the 'Releases' view of the site status page, the publication of all content collected in the open 'current' release can be triggered by 'Finalize' at any time.
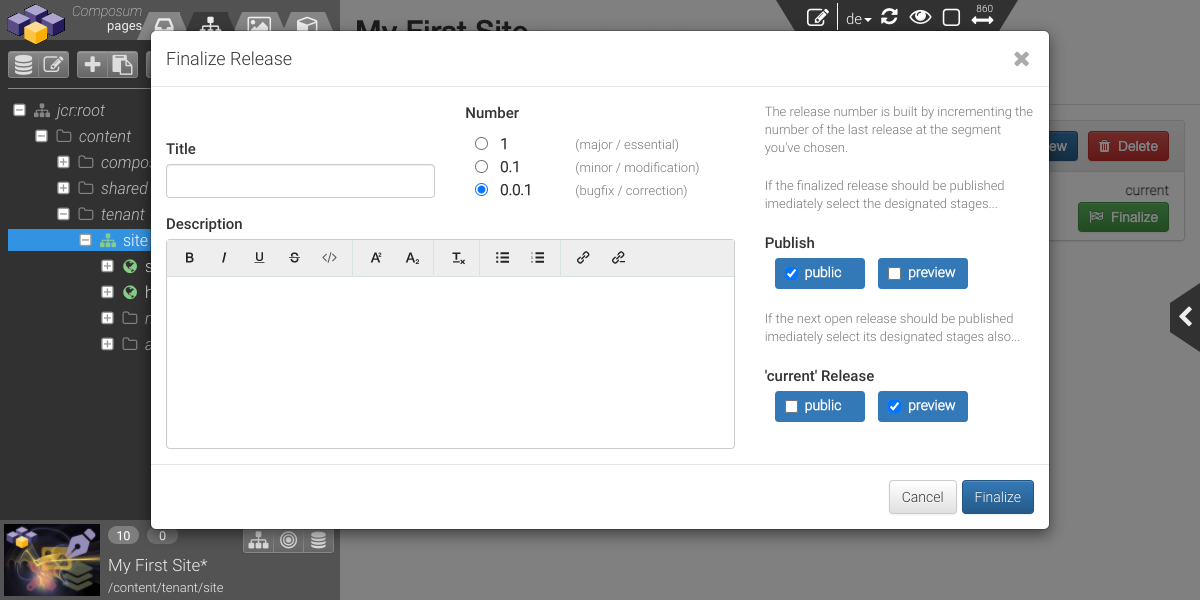
A number is assigned to the new release. Optionally, a title and a description for the release can be added. At the same time, we specify which stage the release should be assigned to. In our case, we specify that the new final release should be assigned to the 'public' stage. At the same time, we specify that the new, automatically generated 'current' release is assigned to the 'preview' stage.
Thus, after publication, i.e. 'Finalize', all future activations will be automatically replicated to the 'preview' stage. A user in a 'visitor' role can already see this content via the preview views before it is made public via the 'public' stage.
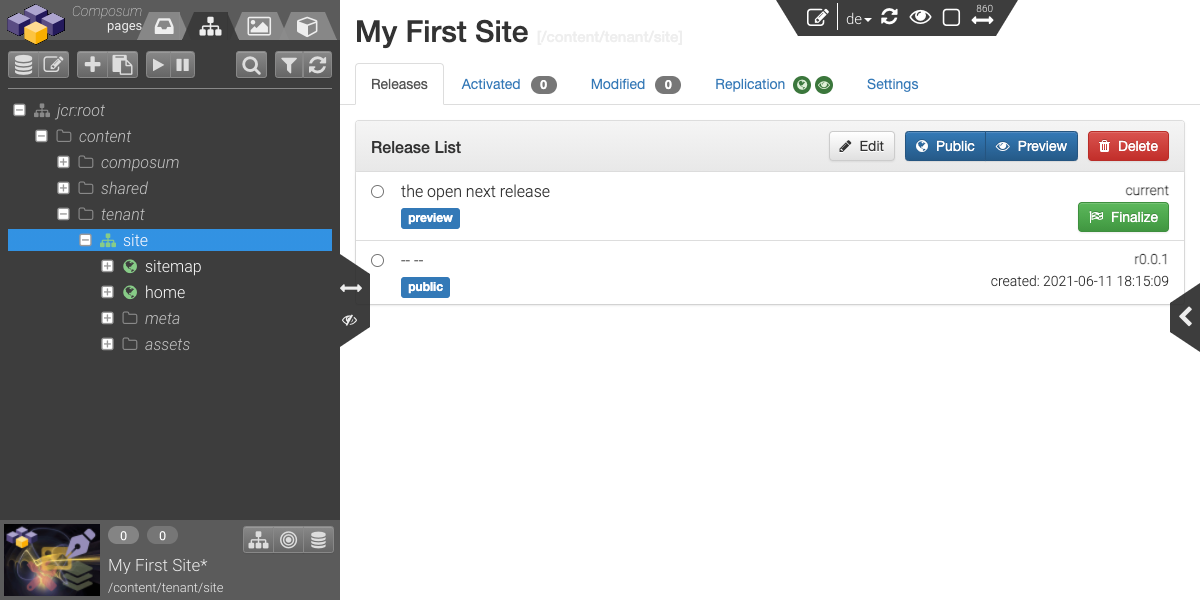
The stages ('preview'/'public') can be assigned to the existing releases as desired. With the assignment, i.e. in our case with the 'Finalize', the replication takes place automatically according to the assigned replication configuration.
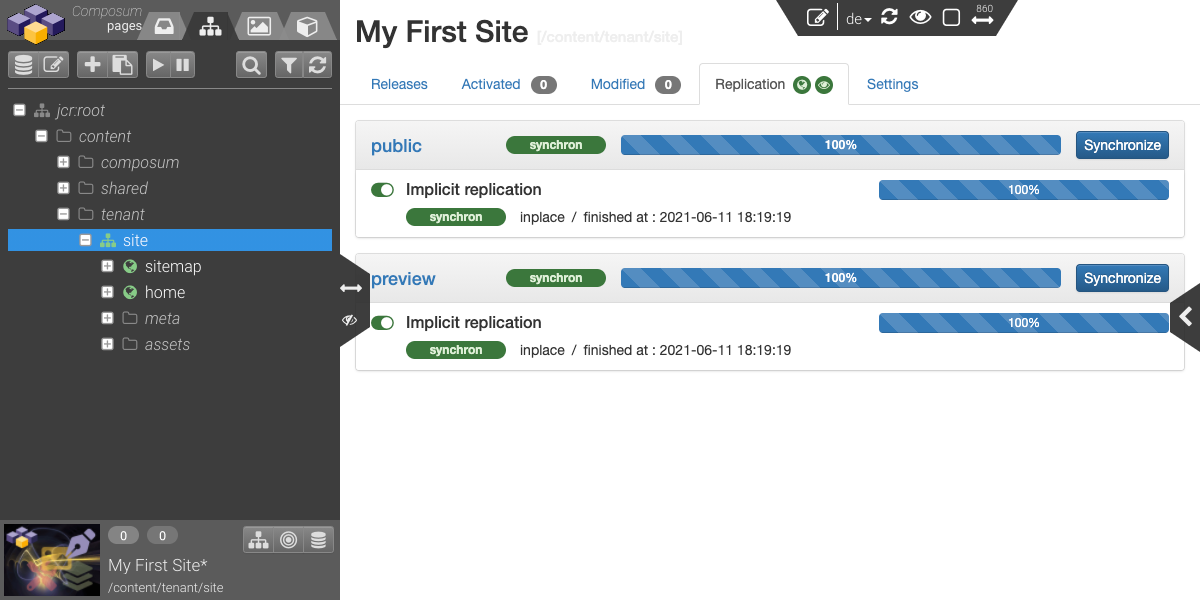
In the corresponding status view of the site, this replication can be explicitly triggered, evaluated and controlled.
With the replication, the contents of the new site are already 'public'. With the implicit in-place replication (nothing else is configured initially), all related content of the new site will be
is replicated
- from /content/... to /public/... and
- in this specific case also to /preview/...
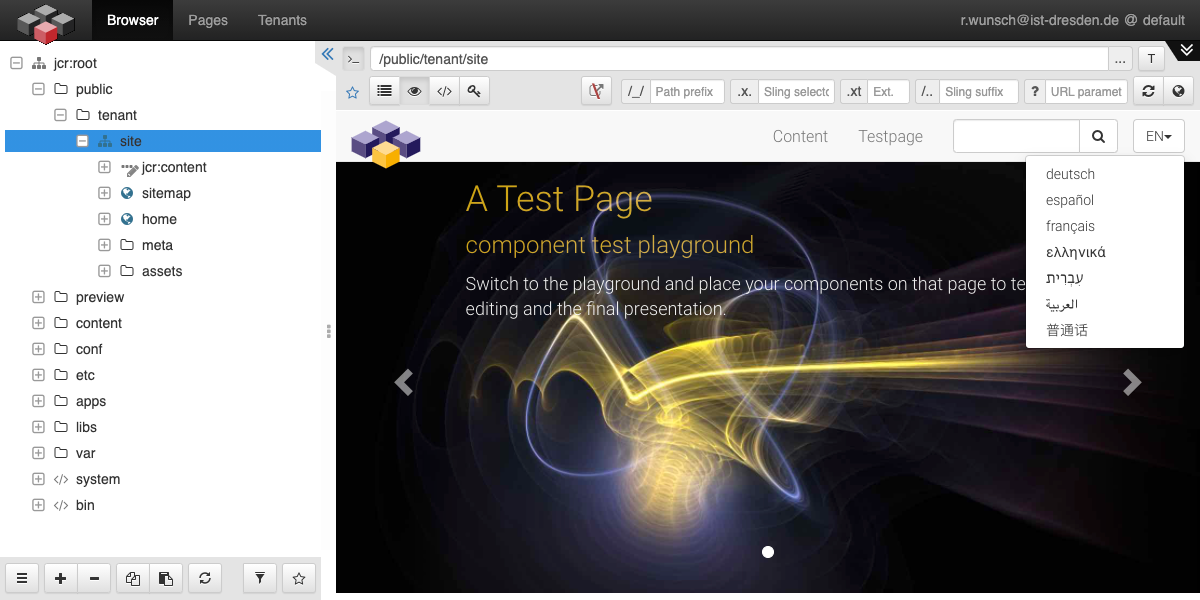
The result can be viewed directly in the repository browser. This can be accessed directly from Pages via the 'Tools' menu behind the Composum logo.
In our example, I used the cloud installation of Composum (cloud.composum.com), in whose multi-tenancy context each client is assigned matching root paths to each stage. The contents of the 'public' stage can therefore be found under /public/tenant/site, matching the root path of the client (/content/tenant) and the name of the new site (site).
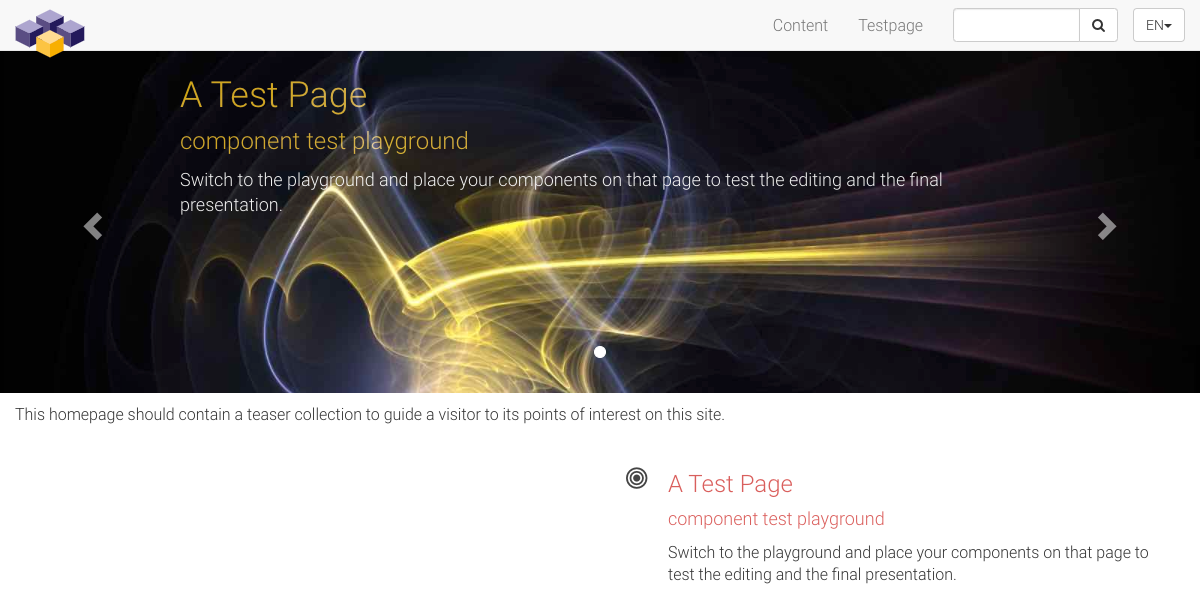
In the Composum Cloud, content published in this way is also immediately accessible at https://cloud.composum.com with the corresponding path of the public stage, i.e. here at https://cloud.composum.com/public/teanant/site.html.
But this should not be enough. With the multi-tenancy module on the Composum Cloud, the appropriate host of the 'public' stage of the new site can also be configured and assigned if the user is in the 'manager' role.
The tenant configuration can also be accessed from the Tools menu (Pages logo). The host 'demo.composum.com' is assigned a CNAME record in the DNS configuration that points to cloud.composum.com.
demo CNAME cloud.composum.com.A host configuration can be created directly in the Tenant console for this host name.
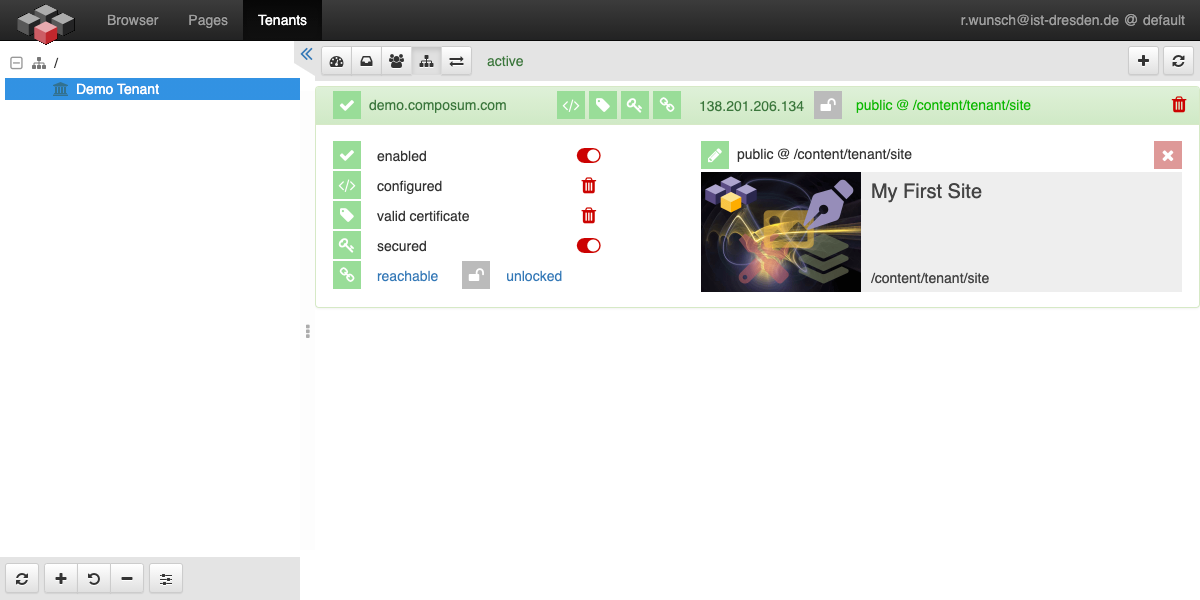
A tenant manager of the client can assign any stage of one of its available sites to each host configured in this way. Once the 'public' stage of the new site has been assigned, it is then also accessible via the configured host at https://demo.composum.com/.
Just try it once on Composum Cloud - cloud.composum.com.
